渗透工具用法(三)Nmap 的用法
前言
此系列笔记是网络渗透工具的使用方法, 本篇是介绍端口扫描工具 Nmap 的使用方法。Nmap 在渗透测试中经常用到, 它不仅可以用来确定目标网络上计算机的存活状态, 而且可以扫描各个计算机的操作系统、开放端口、服务, 还有可能获得用户的证书。熟练掌握 Nmap 的用法, 可以极大的提高渗透测试技术。
Nmap 环境
kali Liunx 里已经集成了 Namp 环境, 所以就不在 Windows 下进行了。
Nmap 命令结构
Scanning Format:
nmap -[option] [IP or domain] -oN [fileName.txt]
Nmap 使用解释
识别系统
Scanning Format:
nmap -O -Pn [IP or domain]
使用 -O 选项, 可以获取到被扫描的主机的系统。 -Pn 选项禁用 Nmap 网络发现功能, 假定所有系统都是活动的
Timing 模板
timing 参数可以指定 nmap 扫描的速度。其中各个选项如下:
- T0 => paranoid 慢速网络扫描, 串行扫描, 两次扫描间隔
5 分钟。扫描速度极慢。 - T1 => Sneky 慢速网络扫描, 串行扫描, 两次扫描间隔
15 秒, 扫描速度较慢。 - T2 => Polite 中速网络扫描, 串行扫描, 两次扫描间隔
400 毫秒, 扫描速度慢。 - T3 => Normal 中速网络扫描, 并行扫描, 两次扫描间隔
0 秒, 扫描速度正常。 - T4 => Aggressive 快速网络扫描, 并行扫描, 两次扫描间隔
0 秒, 扫描速度较快。 - T5 => Normal 快速网络扫描, 并行扫描, 两次扫描间隔
0 秒, 扫描速度极快。
Scanning Format:
nmap -T[0-5] [IP or domain]
扫描方式
TCP 扫描
端口扫描中最稳定的, 利用的是 TCP 三次握手。TCP 扫描通常用于收集有关目标的更多信息, 但是会和目标主机建立一个完成的 TCP 连接。
Scanning Format:
nmap -sT -Pn [IP or domain]
提示
-sT TCP 连接扫描( s ==> 哪种类型扫描; T ==> TCP 类型)
SYN 扫描
TCP 两次握手(隐藏扫描, 速度快, nmap 缺省参数)
Scanning Format:
nmap -sS -Pn [IP or domain]
提示
-sS SYN 连接扫描( s ==> 哪种类型扫描; S ==> SYN 类型)
ACK 扫描
ACK 扫描, 用于确定 TCP 端口是否被防火墙过滤。
Scanning Format:
nmap -sA -Pn [IP or domain]
提示
-sA ACK 连接扫描( s ==> 哪种类型扫描; A ==> ACK 类型)
UDP 扫描
DHCP, DNS, SNMP, TFTP 等都使用了 UDP 协议;UDP 扫描会评估目标系统上的 UDP 端口, 可以确认 UDP 端口是开放还是被防火墙过滤。
Scanning Format:
nmap -sU -Pn [IP or domain]
提示
-sU UDP 连接扫描( s ==> 哪种类型扫描; U ==> UDP 类型)
-sV UDP 扫描中添加版本扫描信息( V ==> 版本信息)
不存在 -Pn 参数(从 UDP 协议去理解, 你发了就 ok 管他收没收到)
扫描 IP 段
For Example:
nmap 192.168.1.1-255    # 扫描 192.168.1.1-192.168.1.255 所有 IP
nmap 192.168.1.1/24     # 扫描 192.168.1.1-192.168.1.255 所有 IP
nmap -iL IPL.txt        # 扫描 IPL.txt 中保存的所有 IP
输出保存选项
- -oN => 保存为文本文件
- -oX => 保存为 XML 文件
- -oG => 保存为 GREPable 输出
- -oS => 脚本输出
其他更详细的扫描
Nmap 扫描策略
# 适用所有大小网络最好的 nmap 扫描策略

# 主机发现,生成存活主机列表
nmap -sn -T4 -oG Discovery.gnmap 192.168.56.0/24
grep "Status: Up" Discovery.gnmap | cut -f 2 -d ' ' > LiveHosts.txt

# 端口发现,发现大部分常用端口
# https//nmap.org/presentations/BHDC08/bhdc08-slides-fyodor.pdf
nmap -sS -T4 -Pn -oG TopTCP -iL LiveHosts.txt
nmap -sU -T4 -Pn -oN TopUDP -iL LiveHosts.txt
nmap -sS -T4 -Pn --top-ports 3674 -oG 3674 -iL LiveHosts.txt

# 端口发现,发现全部端口,但 UDP 端口的扫描会非常慢
nmap -sS -T4 -Pn -p 0-65535 -oN FullTCP -iL LiveHosts.txt
nmap -sU -T4 -Pn -p 0-65535 -oN FullUDP -iL LiveHosts.txt

# 显示 TCP\UDP 端口
grep "open" FullTCP|cut -f 1 -d ' ' | sort -nu | cut -f 1 -d '/' |xargs | sed 's/ /,/g'|awk '{print "T:"$0}'
grep "open" FullUDP|cut -f 1 -d ' ' | sort -nu | cut -f 1 -d '/' |xargs | sed 's/ /,/g'|awk '{print "U:"$0}'

# 侦测服务版本
nmap -sV -T4 -Pn -oG ServiceDetect -iL LiveHosts.txt

# 扫做系统扫描
nmap -O -T4 -Pn -oG OSDetect -iL LiveHosts.txt

# 系统和服务检测
nmap -O -sV -T4 -Pn -p U:53,111,137,T:21-25,80,139,8080 -oG OS_Service_Detect -iL LiveHosts.txt

# 扫描 B 段的存活主机
nmap -v -sn -PE -n --min-hostgroup 1024 --min-parallelism 1024 172.16.0.0/16 | grep -v down | grep "172.16."
Nmap 躲避防火墙
# 分段
nmap -f

# 修改默认 MTU 大小,但必须为 8 的倍数(8,16,24,32 等等)
nmap --mtu 24

# 生成随机数量的欺骗
nmap -D RND:10 [target]

# 手动指定欺骗使用的 IP
nmap -D decoy1,decoy2,decoy3 etc.

# 僵尸网络扫描, 首先需要找到僵尸网络的IP
nmap -sI [Zombie IP] [Target IP]

# 指定源端口号
nmap --source-port 80 IP

# 在每个扫描数据包后追加随机数量的数据
nmap --data-length 25 IP

# MAC 地址欺骗,可以生成不同主机的 MAC 地址
nmap --spoof-mac Dell/Apple/3Com IP
Nmap 进行 Web 漏洞扫描
cd /usr/share/nmap/scripts/
wget https://www.computec.ch/projekte/vulscan/download/nmap_nse_vulscan-2.0.tar.gz && tar xzf nmap_nse_vulscan-2.0.tar.gz
nmap -sS -sV --script=vulscan/vulscan.nse target
nmap -sS -sV --script=vulscan/vulscan.nse –script-args vulscandb=scipvuldb.csv target
nmap -sS -sV --script=vulscan/vulscan.nse –script-args vulscandb=scipvuldb.csv -p80 target
nmap -PN -sS -sV --script=vulscan –script-args vulscancorrelation=1 -p80 target
nmap -sV --script=vuln target
nmap -PN -sS -sV --script=all –script-args vulscancorrelation=1 target
Nmap 端口扫描
# 使用诱饵隐蔽扫描 nmap -D RND:10 [target] (生成随机数量的诱饵)
# fargement
# data packed – like orginal one not scan packet
# 使用 auxiliary/scanner/ip/ipidseq 来在僵尸网络中查找IP并使用这些IP进行扫描 — nmap -sI ip target
# nmap –source-port 53 target

nmap -sS -sV -D IP1,IP2,IP3,IP4,IP5 -f –mtu=24 –data-length=1337 -T2 target (随机使用不同的IP进行扫描)
nmap -Pn -T2 -sV –randomize-hosts IP1,IP2
nmap –script smb-check-vulns.nse -p445 target (使用 NSE 脚本)
nmap -sU -P0 -T Aggressive -p123 target (攻击式扫描 T1-T5)
nmap -sA -PN -sN target
nmap -sS -sV -T5 -F -A -O target (版本检测)
nmap -sU -v target (Udp)
nmap -sU -P0 (Udp)
nmap -sC 192.168.31.10-12 (全部使用默认配置)
示例扫描
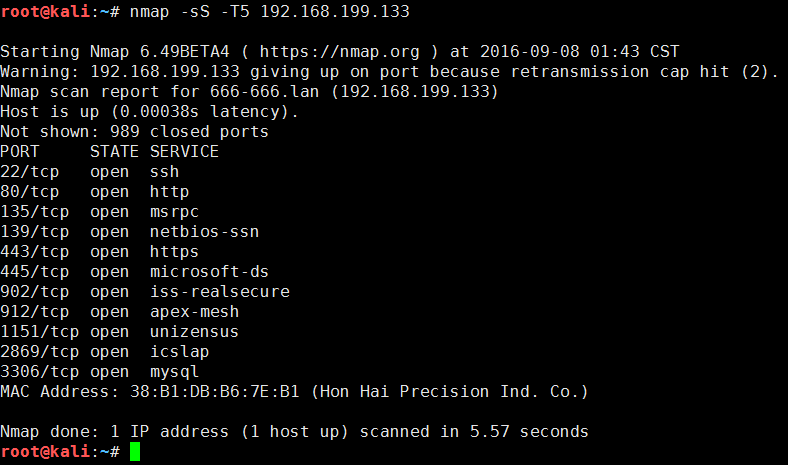
示例一: SYN 扫描
For Example:
nmap -sS -T5 192.168.199.133
示例二: 基础信息扫描
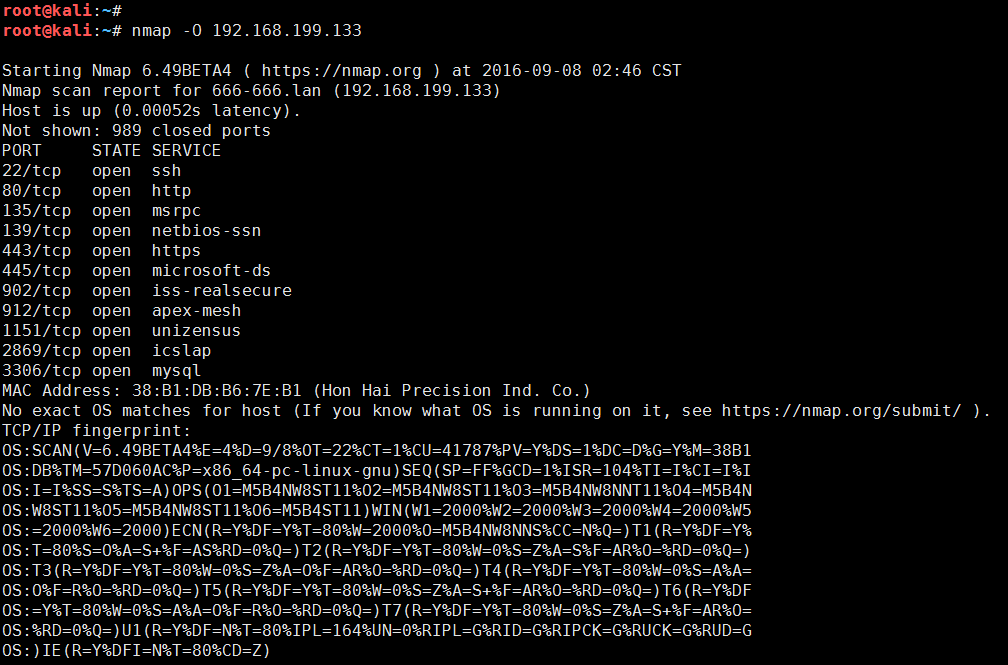
For Example:
nmap -O 192.168.199.133
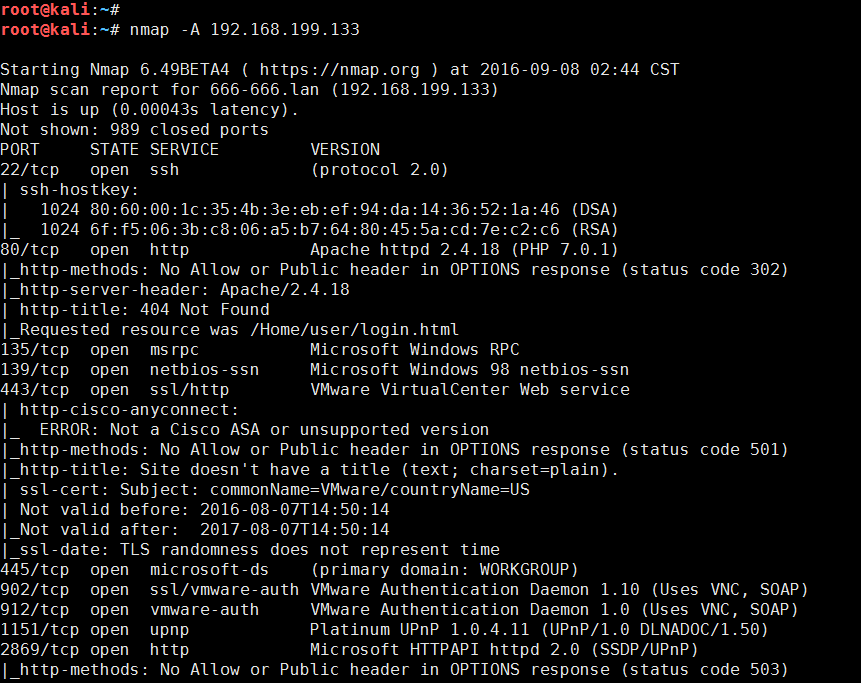
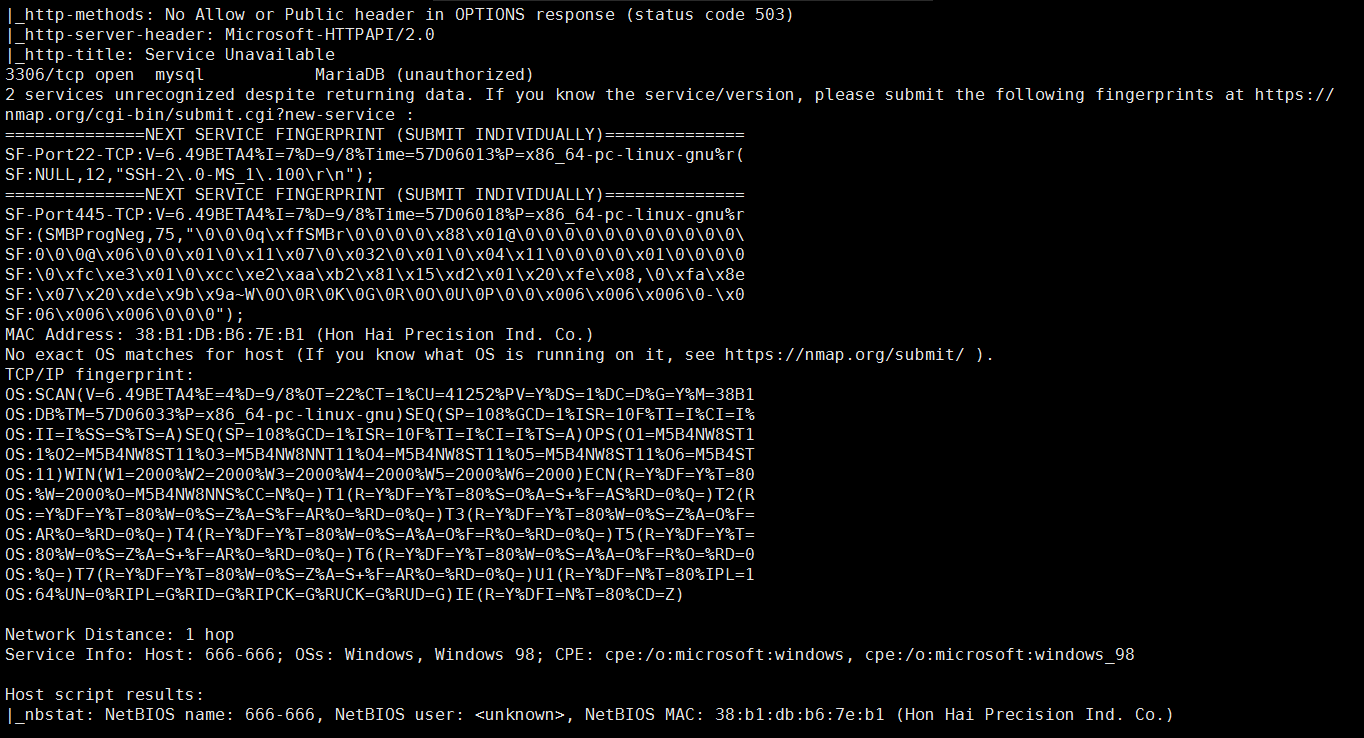
示例三: 详细信息扫描
For Example:
nmap -A 192.168.199.133

示例四: 网段扫描
For Example:
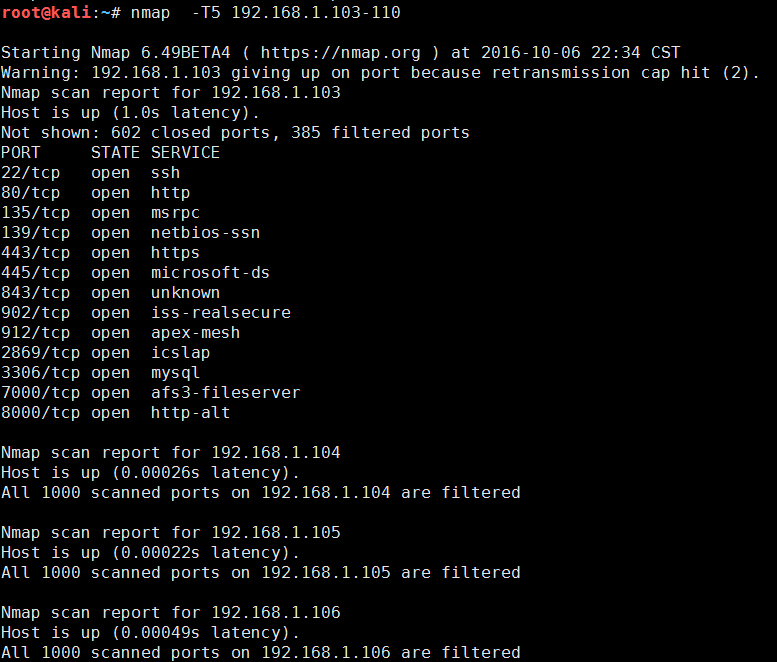
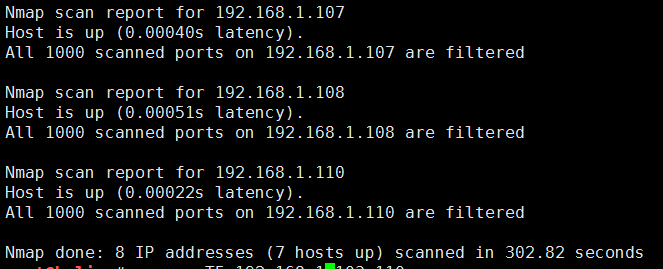
nmap -T5 192.168.1.103-110
