在 IntelliJ IDEA 中配置 Spring Boot 项目的热部署
前言
Spring Boot 是由 Pivotal 团队提供的全新框架, 其设计目的是用来简化新 Spring 应用的初始搭建以及开发过程。该框架使用了特定的方式来进行配置, 从而使开发人员不再需要定义样板化的配置。Spring Boot 的 Web 项目, 在每一次修改了 java 文件或者是 resource 的时候, 都必须去重启一下项目, 这样的话浪费了很多的时间, 实现了热部署, 在每一次作了修改之后, 都会自动的重启。
使用 IntelliJ IDEA 创建 Spring Boot 项目
新建 Spring Initializr 项目

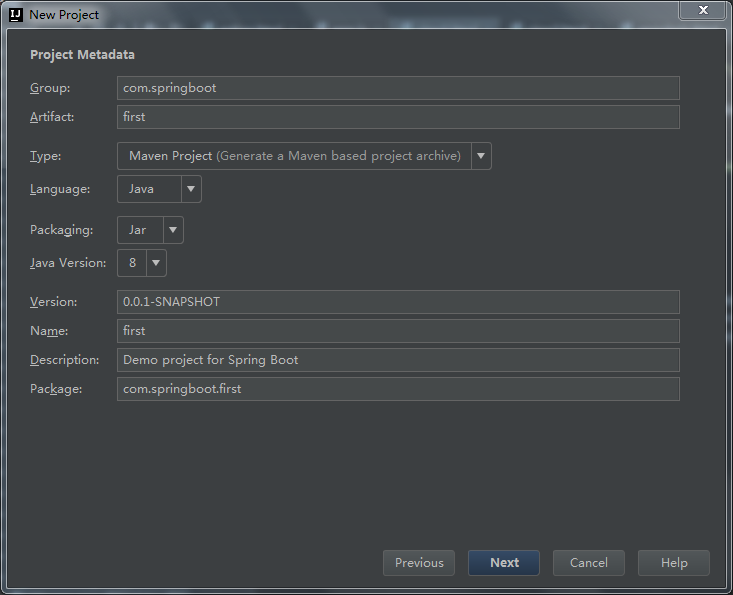
填写项目信息
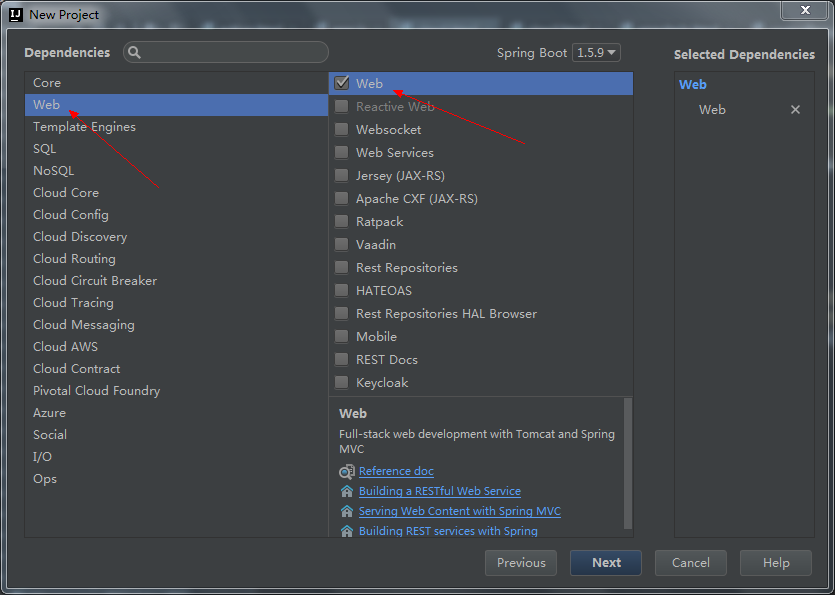
选择项目使用的技术
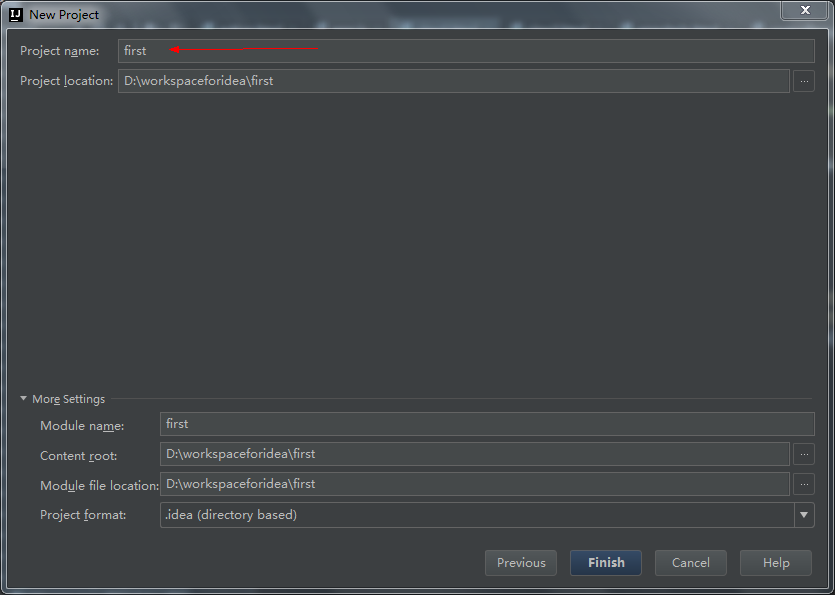
填写项目名称
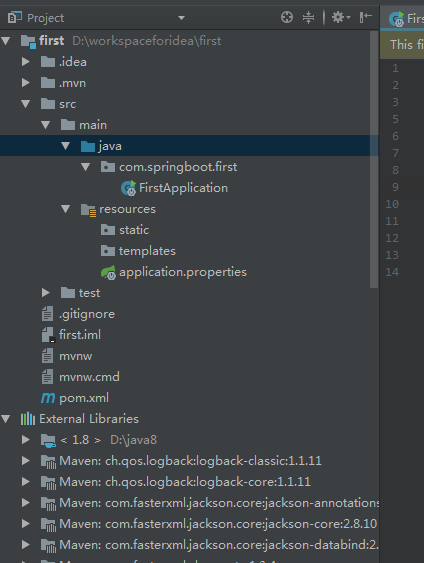
项目架构及依赖
添加测试控制器
找到入口的文件, 将其修改成如下所示
package com.springboot.first;

import org.springframework.boot.SpringApplication;
import org.springframework.boot.autoconfigure.SpringBootApplication;
import org.springframework.web.bind.annotation.RequestMapping;
import org.springframework.web.bind.annotation.RestController;

@RestController
@SpringBootApplication
public class FirstApplication {

    @RequestMapping("/")
    String index() {
        return "Hello Spring Boot";
    }
    public static void main(String[] args) {
        SpringApplication.run(FirstApplication.class, args);
    }
}
提示
@SpringBootApplication 是 Spring Boot 项目的核心注解, 主要目的是开启自动配置。main 方法是一个标准的 Java 应用的 main 方法, 主要作用是作为项目启动的入口。
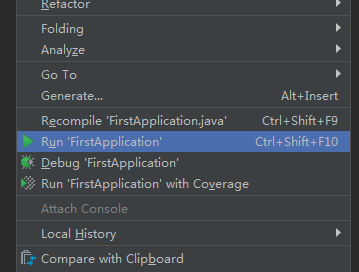
访问测试
运行项目, 把它当成一个 java 类运行就可以了
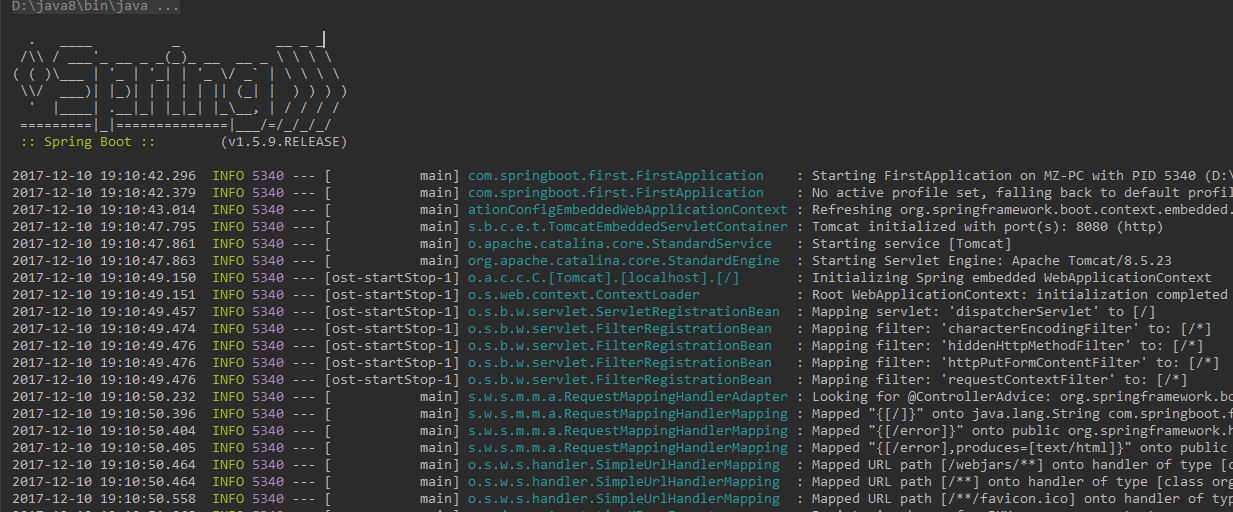
运行信息
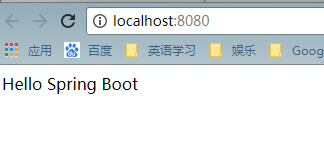
浏览器访问
IntelliJ IDEA 配置热部署
配置 pom.xml
引入热加载的插件
<dependency>
    <groupId>org.springframework.boot</groupId>
    <artifactId>spring-boot-devtools</artifactId>
    <optional>true</optional>
</dependency>
project 中添加 spring-boot-maven-plugin, 主要在 eclipse 中起作用, idea 不需要加此配置, springboot 项目的话, 应该是有此配置, 加里面的内容即可。
<build>
    <plugins>
        <plugin>
            <groupId>org.springframework.boot</groupId>
            <artifactId>spring-boot-maven-plugin</artifactId>
            <configuration>
                <fork>true</fork>
            </configuration>
        </plugin>
    </plugins>
</build>
配置 Maven 下载加速
右键项目选中 maven 选项, 然后选择 "open settings.xml" 或者 "create settings.xml", 然后把如下代码粘贴进去就可以了. 重启 IDE, 感受速度飞起来的感觉吧!!!
<?xml version="1.0" encoding="UTF-8"?>
<settings xmlns="http://maven.apache.org/SETTINGS/1.0.0"
          xmlns:xsi="http://www.w3.org/2001/XMLSchema-instance"
          xsi:schemaLocation="http://maven.apache.org/SETTINGS/1.0.0 http://maven.apache.org/xsd/settings-1.0.0.xsd">
    <mirrors>
        <!-- mirror
         | Specifies a repository mirror site to use instead of a given repository. The repository that
         | this mirror serves has an ID that matches the mirrorOf element of this mirror. IDs are used
         | for inheritance and direct lookup purposes, and must be unique across the set of mirrors.
         |
        <mirror>
          <id>mirrorId</id>
          <mirrorOf>repositoryId</mirrorOf>
          <name>Human Readable Name for this Mirror.</name>
          <url>http://my.repository.com/repo/path</url>
        </mirror>
         -->

        <mirror>
            <id>alimaven</id>
            <name>aliyun maven</name>
            <url>http://maven.aliyun.com/nexus/content/groups/public/</url>
            <mirrorOf>central</mirrorOf>
        </mirror>

        <mirror>
            <id>uk</id>
            <mirrorOf>central</mirrorOf>
            <name>Human Readable Name for this Mirror.</name>
            <url>http://uk.maven.org/maven2/</url>
        </mirror>

        <mirror>
            <id>CN</id>
            <name>OSChina Central</name>
            <url>http://maven.oschina.net/content/groups/public/</url>
            <mirrorOf>central</mirrorOf>
        </mirror>

        <mirror>
            <id>nexus</id>
            <name>internal nexus repository</name>
            <!-- <url>http://192.168.1.100:8081/nexus/content/groups/public/</url>-->
            <url>http://repo.maven.apache.org/maven2</url>
            <mirrorOf>central</mirrorOf>
        </mirror>

    </mirrors>
</settings>
IntelliJ IDEA 相关配置
点击 file , Settings , Build , Execution, Deplment
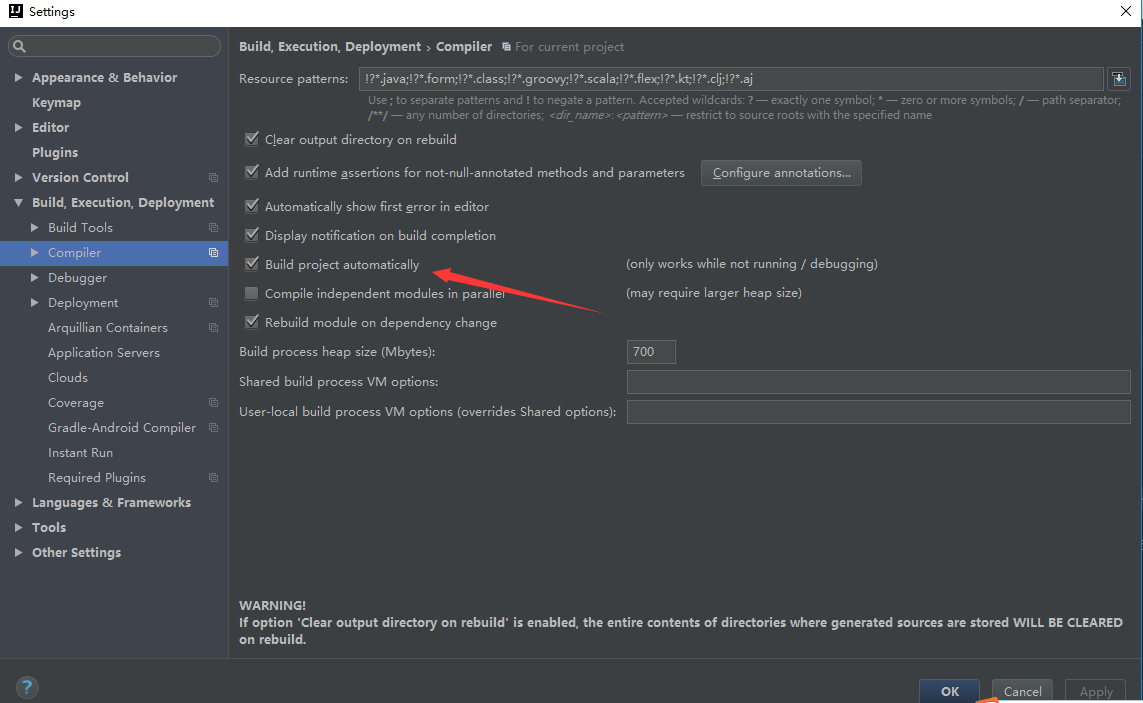
然后记得 apply, ok
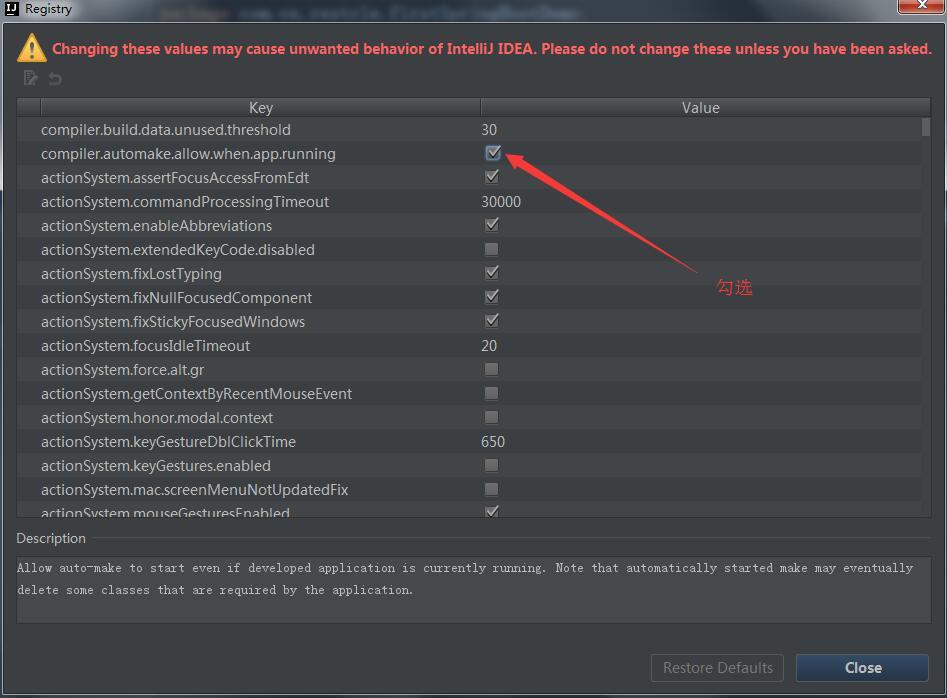
组合键: Shift+ALT+Ctrl+/ , 选择"Registry", 回车, 找到"complier.automake.allow.when.app.running"
到此全部配置完毕, 手动重启一次, 修改代码保持即可看到控制台在自动重启